Showing posts with label DIY. Show all posts

Thursday, January 26, 2012

ARE YOU READY FOR THIS?

I just got done re-doing the hall bath upstairs last night around midnight.  I AM SO PROUD OF IT!!!!!  I literally did everything by myself, I picked out all of the paint and painted myself, I picked out the artwork, the decorations, and everything and I did the whole thing on my own and didn't let Josh see it for over a week.  I revealed it to him last night and he was happy :-)  I mentioned in this post what my plans were and I actually followed through and I am totally IN LOVE.

Just so you remember, here is the before:


And AFTER:


I will hopefully be back soon to post about how I did it!  

Wednesday, November 23, 2011

Wedding Gifts: Make it Count.

One of my favorite things is giving gifts.  I will admit: it can be scary sometimes, though.  Christmas time is kind of frustrating.  As much as everyone loves giving gifts, what's the point if you don't even know what to get them?  Why buy a gift just because you feel obligated?  I figured out the solution: only give personal or sentimental gifts.  Or a mixture between something they need and something personal.  I posted over the summer about my BFF's wedding and how we made them their tiered-towel-cake in their wedding colors:


The best parts about this gift?
  1. We purchased the towels from their registry, so they got what they needed/wanted.
  2. I made it myself and gave it a personal touch.
  3. It matched their wedding colors and looked so darn cute on the gift table.
So, at the last two weddings that I have been to (both in the last month) I wanted to replicate that feeling (but still trying something different.  For my friend Meghan's wedding, I decided to make them some picture frames to remember their wedding.  Meghan and I had been talking about how she wanted more personal stuff in her house, so I did it for her :-)

I purchased three white frames:


An 8x10, a 4x6, and a 5x7 shadow box.  In the 8x10 I printed a big monogram "R" (for their new family name) on white cardstock and stuck it in there. 

not a very good pic


For the 4x6, I found this cute card at WalMart and LOVED the little love birds, so I bought that, cut it to size, and placed it in the frame.


I put them in a pretty bag (which I forgot to take a picture of) and gave them a really nice card with some cash.  Once again, they get the personal side and something that they need/want (money!).  I also told them that there was one more frame to come.  While at the wedding, I took this picture of Meghan holding the train of her dress by the little ribbon "strap".  It is about as artistic as my photo-taking-skills get.


I also stole the place card with their new "Mr. and Mrs. Wesley Rice" name on it from their actual table at the wedding.  I kept the stamp from the invitation I received from NY because it had her wedding themed stamp on it from her hometown postal office.  I also dried some leaves and flowers from my bridesmaid bouquet, put them in the shadow box frame, added the other stuff, and gave it as the final part to their gift a week or so later.

also not a very good pic

I did the same thing for my brother and sister-in-law's wedding on Saturday.  They were registered for a bunch of kitchen stuff and I knew they needed it.  Some of my favorite things in my kitchen are the little gadgets that I picked out and received for our wedding.  Especially because they all match and are in the same drawer.  Yeah, I'm type-A like that.  So I bought all that kind of stuff off their registry.


I also needed to give a personal touch.  So I bought them this beautiful and inspirational book:


He is the author of The 5 Love Languages.  And this book is basically a collection of a bunch of very inspirational faith-driven love stories that test time and test everyday life.  I thought it would be a beautiful and motivational way to start a marriage.

Another cool thing in this wedding was that my brother married a woman who already had a daughter from a previous relationship.  In the ceremony, they wrote and spoke beautiful vows to my new three-year-old niece, Baelee, and presented her with a necklace in which my brother promised to love her as his own and keep her safe forever.  It officially made me cry.  Here is a pic last Easter of my family with my dad:

My dad is holding sweet Baelee.

And her is a picture of Baelee on the wedding day showing off the flower girl dress (that I bought for her).  I just needed to throw that in there because I am proud of it :-)


So, I thought it was really important for me to give a gift to them that could be appreciated by their whole family.  I saw a few things online about creating a Thanksgiving jar.  So, I bought a little jar and put some cute gold stickers on top to say "give thanks".


I tied a ribbon around the jar and decorated some cards using white cardstock, markers, ribbon, some rhinestone stickers I already had, and a hole punch.


I wrote on their card that every day from now until Thanksgiving, they could each write something that they are thankful for, fold it, put it in the jar, and then on their first holiday as a family, they could pull them all out and read them together.  And if they kept the jar, they could make it a tradition each year (which I also plan to do someday when I have a family 'cause its just so cute). 

I also included a pack of colorful dry erase markers because 3 year old Baelee can't really write her thanks on cards this year, but she can decorate the jar with markers.  And the best part, she can wipe it off and redecorate it each year.


I bought matching gift wrap, bag, balloon, and tissue paper from the dollar store and bought hot pink ribbons and bows, too.  (Her colors were black, silver, and hot pink).

Once again, it looked absolutely adorable on the gift table.


There you have it.  Give sentimental gifts.  Take a few extra minutes and make it personal.  Think about your gifts ahead of time.  They will be remembered forever.

Friday, November 18, 2011

Gallery Wall Part Dos

A Sequel to Gallery Wall Part Uno.  In a recent post, I mentioned that the gallery wall was no longer going to be in the living room.  Better judgement led us to believe that it belonged in the office.  So, true to younghouselove's tutorial (my favorite home-decor blog), we decided to use magazine pages cut to the size of each frame.  We labeled everything (of course) and arranged them on the wall in the office to figure out spacing issues. I filled all the frames with art that we I love, labeled them with numbers, cut the magazine pages to size and labeled those with the same numbers.  Then, I arranged the frames on the floor in a shape that I liked.

The rest was up to Josh.  His job was to "replicate" the floor version of frames with the paper on the wall taped with painter's tape.  This was his job, as he is the "spacing" and "measuring" person in our house.  I get overwhelmed with those things and I am certain that whatever part of the brain that deals with those things is missing from my body.  Anyway, here are some in-progress photos of our gallery wall, which I have more appropriately coined as "The Gallery Cloud".

Frames aligned on the floor with their respective magazine pages on top (to hide the art that will be revealed later)

Josh "hanging" the magazine pages in action.

The temporary final product (until frames are actually hung)

I love my cloud.  23 frames of happy.
On another note, I am headed to Cumberland this morning with Josh for my little brother's wedding, which is tomorrow!  Weird to think that my baby brother is going to soon be a husband.  I hope to take lots of pictures and share some details later :-)  Have a great weekend!

Friday, November 11, 2011

Someone Lives in My House!

First of all, it is 11/11/11 and I am posting this at 11:11am.  By the way, this is officially the best day (and minute) ever because 11 is my favorite number.  Who cares that it was a full moon last night and my students are nutso?  Anyway...

I will be the first to admit:  I'm not much in a garden.  I'm not much of an "outside your house" decorator.  I wish I could do better... maybe next spring and summer.  But it occurred to me the other day as I was driving up to my house on my way home from work that someone could literally walk by my house and assume that it was abandoned.  There is absolutely not one personal "thing" outside our home that would make a passerby assume that someone lived there.  I hope to eventually put a bench or some rocking chairs on the front porch with a tiny end table so I can sit out there in the summer and drink my morning coffee.  Wouldn't that be nice?  But for now I was on a tight budget.  So I thought a wreath would be appropriate.  I love wreaths.  Outside only.  And I would love to have a collection of wreaths that I can swap with seasons/moods.  This is officially Wreath #1 Post.

I was inspired on Pinterest by a bunch of felt rosette wreaths like this one:

Pinned Image

and this one:

Pinned Image

And believe it or not, I did it! And it cost me less than $6.  I bought one grapevine wreath and 5 pieces of felt, spent about one hour on the floor with scissors and a hot glue gun and I came up with this:


It's so easy.  Cut out a circle of any size.  I chose a few different sizes.  Cut a spiral from the outside and keep going until you get to the middle.


Simply roll it up from the outside in.  Glue it at the end and glue it to the wreath.  It's that easy.  And now it looks like someone lives here:


I love it.  Even Josh loves it.  And he usually thinks that my DIY/craft projects turn out like kindergarten art.  And now it looks like someone lives here.  And I am on my way to having a multitude of wreaths that I can switch out whenever I want.  By the way, did you notice the porch "ceiling"?  Look, it's beautiful:


Beautiful hardwood!  It's awesome and we love to look at it.  We want to stain it next spring. It needs to be kept up so it will stay nice.  Happy weekend!

Monday, October 3, 2011

Mirror, Mirror, On the Wall

When I was at Marshall's a few weeks ago buying an ironing board cover to update our ironing board, I picked up this beauty for only 12 bucks.


I LOVE circle mirrors and this one was just awesome.  But there was one problem.  I didn't like the antique-iness of it, see?


So I thought, Easy fix.  I'll just paint it.

I would have liked to paint it a crazy color like pink or yellow or something, but couldn't really find a reason.  So I figured I would paint it a charcoal gray (safe) and if I ever wanted to change it I could.  So I gathered my stuff.  I thought it would be easy.  I would just take the mirror out, spray paint the outside part, and then stick the mirror back in.  It looks like you can do that because of the cardboard on the back and the little clasps that seem to be holding it in.


But, of course, it wasn't that easy.  The cardboard was glued to the glass, which was also glued to the edges of the mirror.  There was no chance of getting it out.  Plan B was to cover the mirror, and paint around it.  But how?  I have plenty of card stock, but couldn't bear the idea of wasting it on this, so I used old already-colored pieces of card stock that I had printed as coloring pages and then colored (or partially colored).  I just taped them on with painters tape and cut them in a circle, taped around the edges so that I would not get any paint on the mirror itself, and then spray painted it!


I know what you're thinking.  And the answer is yes.  I actually print card stock into coloring pages (sometimes even Sponge Bob) and color them with Sharpie markers.  So sue me.

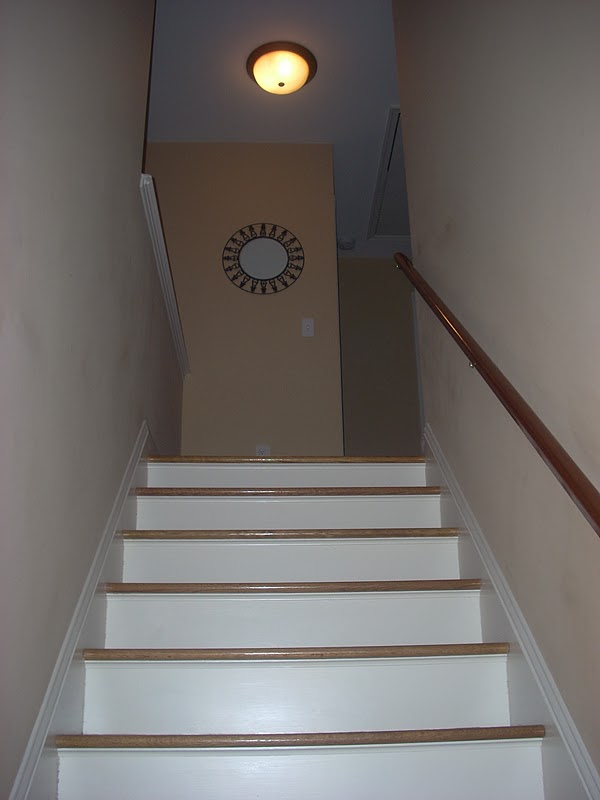
Anyway, after letting the paint dry and revealing the final product, I was satisfied.  My intention was to put the mirror in the office upstairs, but on my way up, I saw an opportunity.  And it was meant to be:


At the top of the stairs!  Please ignore the weird light at the top.  How do you like it?  I don't know if that is going to be its permanent home, but it looks good for now.


I just had to take a picture of me taking a picture.  And this seemed like the most appropriate face.

Monday, September 19, 2011

An Updated Ironing Board and Our Messy Pantry

On Saturday, the WVU game was on and while Josh and his parents were at a sports bar watching the game, I was at Home Depot picking up paint chips and Marshall's looking for who-knows-what.  I left Home Depot with a ton of paint chips (one of which we actually like) and left Marshall's with an awesome mirror (updates on that later) and a sa-weeeet new ironing board cover.

The ironing board that we currently have is as old as dirt.  That's something my grandfather would have said.  But seriously, it is.  Josh's mom gave it to us about a year ago when she bought a new one.  It was so old and to be honest, pretty ugly, so she didn't mind getting rid of it.  However, she was shocked to find that her new ironing board, which was made of plastic, was wayyy less sturdy and definitely not made well.  This ironing board is practically made of steel!


Yeah, it's big.  And heavy.  And old.  And ugly.  But it works like a charm! I found out this weekend while Josh's mom was visiting that it was actually HER mom's ironing board first.  So, this thing is probably older than me.  And I'm pretty sure that the fabric is original.


So, I found the ironing board cover I liked best at Marshall's, purchased it for $9.99, and got inspired.  I couldn't leave those green legs, though, right?  So I decided to spray paint them.  I took the old cover off, threw it in the trash, flipped it upside down, and went to town.


I flipped it because it would be easier to paint the legs this way, and I ended up painting the underside of the board as well.  It went from that puke-green to this beautiful, clean white:


I had to paint in the garage because it was raining.  And I had to do it immediately after I got home, rain or shine, because I was so excited.  I know, it's the little things.

I let it dry/cure for about 24 hours and then brought it inside, put the new cover on and our ironing board went from this:


to this:


Ahhhh... feels so much better.  And I love the pretty cover.


And I put it back in our very cramped pantry/laundry room.  


I LOVED this room when we first moved.  It was right off the kitchen with easy access.  I had never had a pantry before, so I was psyched to put our dry goods somewhere else than the cupboards.  And the laundry room was in a convenient, but out of sight place.  But guess what?  The door doesn't even close because the washer and dryer are too big.  Darn.  So it's always open, like this:


See all of those appliances and things at the top?  I am happy to have them out of the way and nothing on my kitchen counters, but I am sad to be looking at them all the time.  I am thinking of putting something over that area, like maybe a curtain or bamboo blinds or something.  And our pantry is very big and happy on the opposite side of the washer and dryer:


Since the door to this room doesn't shut, Josh and I were thinking of putting a different kind of door there, but lately I have been thinking that a really long, subtle curtain would look good, too.  We will see.  So there you have it.  Our updated ironing board and our messy pantry.  Have a beautiful Monday!