Thursday, October 27, 2011

Finally!

We painted the living room!


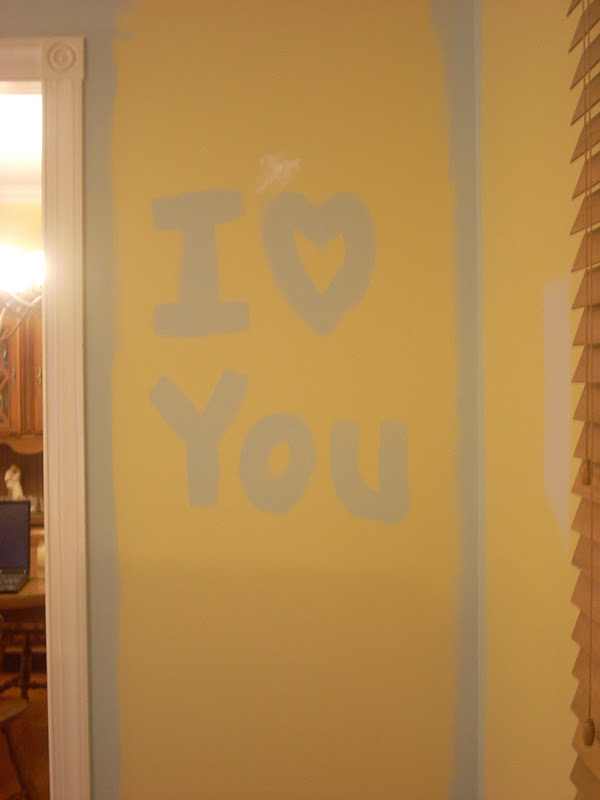
We went with Tidewater by Sherwin Williams color matched to Olympic Premium No-VOC paint (from Lowe's) in eggshell.  We are pleased with our paint job (which took forever) and are happy with the color.  We did this paint job in tiny steps.  We were so super busy so every night we would only have about 40 minutes or so to paint, so I would do the trim on a wall and a half a night and Josh would roll about two walls per night.  It literally took us about a week.  Here are some in-progress photos:


Josh left me a message :-)

This painting process was a learning process!  Things we learned:
  1. Maria must do the trim and edging.  It is necessary.  She is wayyy too much of a perfectionist to trust anyone else (sorry, hubby).  Also, tape is not allowed.
  2. Josh must use the roller.  It hurts Maria's arms.
  3. Don't ever do it over the course of a week again if you plan to use that room during the process.  Instead, wait until you can schedule a day to do it.
  4. Trust your instincts.  Tidewater was our first choice, but we were scared so we tried a bunch of samples until we got back to our original favorite.
  5. Always buy Olympic No-VOC paint.  It has barely any odor and it's safe.


I bought this at TJ Maxx a few weekends ago when my mom  and I went shopping during a WVU game.

The vase on the left was in a box in the attic.  It's from Kohl's over a year ago.  The one in the middle is my first purchase from Hobby Lobby (awesome store).  And on the right is a wine bottle my friend Meghan gave me.
Bought this cute yellow orchid from TJ Maxx with my mom.

 So, we are happy to have our painting finished and even happier to have some decorations in there (even if it's just a few).  We have big plans for this room in the (hopefully) near future.  Here is the short-list:

  1. Make or buy some curtains with some cool (and hopefully cheap) fabric.
  2. DIY some art for above the couch.
  3. Purchase a small chair for the wall by the staircase.
  4. DIY a frame gallery to encompass the chair.
  5. Buy a floor lamp.
  6. Make or purchase some big art for the other walls. 

 My favorite part of the room is this corner:


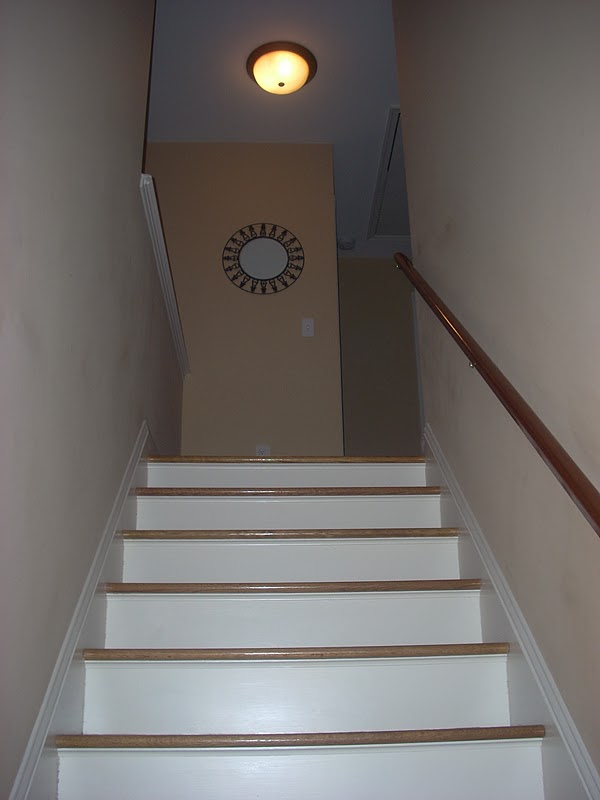
I love the contrast of the colors at the bottom of the staircase.  I would love to put a huge sunburst mirror on the aqua wall right there... maybe in the future.

On another note: my baby brother had his first baby this morning.  Pray for little Marrisa's continuing health :-)

Wednesday, October 26, 2011

She is Framed.

So, since our visit with my dad and his fiance, Terri, we actually framed that canvas painting that they bought us in Haiti while on their cruise.  Framing canvas is tricky and there was no way I was trying it.  Plus, it was a really awkward shape and size and I wasn't about to build a frame.  I had never had anything custom framed before, so I went back to my usual place, Michaels.  I had a coupon for 60% off a custom frame, so I headed up there with my painting and was shocked to find out that even after the discount, it was still nearly $100!  And it was one of the cheapest options! The good thing is that it is made of real wood (most frames that you buy in the store are not) and it is of "gallery quality".  Luckily, dad had offered to pay for the framing once I got it done (thanks, Dad!).  And after about two weeks, she is official-gallery framed and hanging on our wall:


 We weren't exactly sure where to put her, but figured that this was appropriate enough because there was already a nail there and it filled some space above our bed, creating a bedroom which looked about .1% more "finished" than before.  I don't think this will be her permanent home (we have considered the top of the stairs instead of the mirror or in the guest bedroom once we start tackling that). 


We love how authentic it looks and it gives a fun and kind-of-weird touch to our room.  We also thought it was appropriate have the instruments in the background.  And the weird, long, and gangly arms are really neat when you look up close.  It seems like every time I look at it I notice something else.  I am also not so sure why I call her a "she".  There are most obviously men in the picture, but I think she is a she.  What can I say?

 
Has anyone else ever had anything custom framed?  Did the price shock you too?

Tuesday, October 25, 2011

Tasty Tuesdays: New Orleans Style Shrimp


***Tasty Tuesdays is for sharing a meal/dessert/snack recipe that you made this week.  It doesn't have to be gourmet!  It just has to taste good! If you want to link up, let me know and I will link you to my Tuesday posts.  Use this^ button to link back to my page!  

The week before our friends' wedding, we had them over for dinner every night!  And I tried new recipes each time.  Most were great, some were good.  We really liked this take on "New Orleans Shrimp".  I found this recipe from the May 2011 issue of the Food Network Magazine.
 
You will need:
24 lg shrimp in the shell
1 tbsp Creole seasoning (I used Zatarain's)
6 tbsp butter
2 bunches scallions, chopped
1/4 c Worcestershire sauce
1 c frozen corn kernels ( I used a can)
2 plum tomatoes
French Bread
 

1. Peel the shrimp, leaving tails on.  Reserve the shells.  Rinse the shrimp in a colander; drain and pat dry.  Sprinkle with the creole seasoning.  I have found something that I truly hate.  That is peeling raw shrimp.  EWW.


Shells---also gross.
2. Heat 2 tbsp butter in lg skillet over high heat.  Add shrimp shells and half of scallions.  Cook until the shells turn pink (1-2 min).  Add Worcestershire sauce and 1 1/2 c water and cook until reduced by half, about 5 min.


 3. Strain the shrimp broth through a fine-mesh strainer into a bowl, discard the solids.  I didn't have a fine-mesh strainer, but I used a paper towel and squeezed the liquid through it.

4. Melt remaining 4 tbsp butter in skillet over high heat.  Add shrimp and remaining scallions.  Cook until the shrimp turn pink, about 1 minute.  Add reserved shrimp broth and simmer about 3 more min.


4. Meanwhile, put corn in bowl and microwave until hot.  Cut tomato into chunks.  Divide corn and tomato among bowls.  Add shrimp and ladle in the broth.  Serve with bread.  I used toasted french bread.


Monday, October 24, 2011

Back in Black

I'mmm back!  Wow, what a long two weeks it has been!  I will give you an update about what has been going on in our crazy lives.

Well, two weekends ago (the 7th-9th) we went to my mom's for the weekend to attend a WVU game.  We left right after work on Friday, got there late on Friday night, woke up really early Saturday, drove to Morgantown, met Josh's family and friends and tailgated before the game.  I didn't actually have a ticket to the game, so when it started, my mom and I decided to go shopping instead!  Morgantown is practically dead during a game, so we were able to drive around town without much traffic.  Updates will come later, because the shopping trip was "home-decor" inspired.

We drove back late Saturday night, hung out, woke up made muffins on Sunday for my mom's 45th birthday and visited for just a little while.  We then drove all the way back to the other side of Maryland and got ready for school on Monday.

Thanks to my new after school program, I am at school every Monday, Tuesday, and Wednesday until around 6pm.  Then I am always rushing home, starting dinner, doing things around the house, and getting ready for school the next day.  That particular week was the week before our best friends Wes and Meghan's wedding.  So they were super busy and didn't have much time to do anything else, so we invited them over to dinner every night!  I made some pretty good recipes (all new ones), so it was nice experimenting with friends.  Next Tuesday's Tasty Tuesday is going to be one of those recipes.

On Thursdays, I don't have after school programs, but I do have grad school.  So I am always busy that night.  Friday I am ready to konk out, but as you know, last weekend we went to a wedding!  The wedding was in Jamestown, NY, near Lake Erie.  We took off work on Friday and drove up really early in the morning.  We left around 6am (which is earlier than I would have woken up had we gone to school!).  We drove the whole 9 hours up to NY and got there around 3pm.  We checked into our hotel, met our friend Amber, from college, and got ready for the rehearsal and dinner.  The rehearsal was great, the dinner was fun, and we went out afterward to a local bar to hang out the night before the wedding.  Unfortunately, the bride, Meghan, was starting to develop a sore throat at that point, so she took it easy, drank water, and just hung out.

The day of the wedding was crazy.  It was pouring down raining ALL day.  It was actually sleeting a different times of the day.  It was 35 degrees and *no joke* there were 60 mph winds.  On top of that, Meghan woke up with strep throat.  Again, no joke.  She was really sick.  The fever-body-aches-chills-raw-throat kind.  Poor girl.  Fortunately, the wedding was beautiful (despite her almost passing out from being so sick) and everything was perfect.  We took pictures, and got in our awesome limo... which promptly got a flat tire.  Yes, seriously.  We spent a good portion of our limo ride in a garage getting our tire fixed.  Wes wanted to go to a local brewery for beer and pictures before the reception.  I will admit, this was a genius idea.  We got photos by the vats and drank some pumpkin beer.  It was awesome.

Once we got to the reception, poor Meghan really didn't feel well.  While I acted like a fool dancing all night, Meghan mostly sat and watched because she was so sick.  I will say that she looked beautiful.  You couldn't tell she was sick.  Except the shivering, the blanket, and the tears :-(  Poor girl.

Then, the worst thing you could ever imagine.  After we all left the reception and went home (hotel) for the night, Meghan's grandfather had a heart attack and passed away.

It was terrible.  But, we have decided to throw them a wedding re-do/party re-do to celebrate, so they can have a happier day together without death or illness.  Here are Meghan & Wes before we went into the reception:


She was so pretty!  You can view the professional photos (all 886 of them) here.


Please pray for them!

We have made LOTS of updates to the house and I am excited to share :-)  Happy Monday!

Thursday, October 13, 2011

B.R.B.

Been so busy.  Don't have time to talk.  Updates next week (maybe).  Catcha later.

Friday, October 7, 2011

Before and Not-So-After: Other Bathrooms

The people who lived here before us painted almost the entire house in yellows (as you definitely know), tans (seen in the master bedroom, the hallways and foyer, and the laundry room/pantry), and the weird-but-cool green in the kitchen.  But for whatever reason, they chose not to paint the guest bathroom upstairs and the half bath downstairs. I have chosen not to show you the half bath downstairs because it is officially my least favorite room in the entire house.  It's awful, see?

Ignore the flash. I'm crazy.


View from the foyer.

I loathe it so much that I will make a list of the things I hate:
  1. The powder blue paint.  Why did the previous owners leave it this way?!  Not that there's anything wrong with it, per say, but it definitely clashes with the feel of the rest of the house.  And like Michael, an interior designer on The Little Couple said earlier this week, "Why baby blue? They aren't BABIES!"
  2. What is up with that cabinet?  There's no door hardware and there are holes in it!
  3. When we moved in, there was no mirror at all.  We installed that cheap-o $8 mirror from Wal Mart almost immediately.  By the way, I have big plans for that mirror in the future.
  4. The brass fixtures.  The rest of the bathrooms have updated nickel hardware and fixtures, but they left this one.  I find this odd because it is definitely the most-used bathroom when we have company because it is downstairs.
I will admit that I like a few things.  For instance:
  1. The pedestal sink.  I love that sink.  But Josh is not a fan.  More on that below.
  2. The fact that it is small.  Not much to clean or decorate.  By the way--I HATE cleaning bathrooms.  Yuck.
Our vision for this bathroom.  Make it clean and a bit more modern looking.  We love vessel sinks (the kind where the sink bowl is on top of the vanity rather than down inside).  This bathroom is our inspiration (not necessarily color-wise):

Source
We like the simplicity and clean lines.  I would hate to get rid of the pedestal sink, but Josh doesn't like it.  And we both really like the vessel sink.  But that's wayyy in the future.

On to the Guest Bathroom.  It's also baby blue.  Yep.  Crazy.  But we added a bunch of white stuff (curtain, towels, tissue holder, trash can).  I like the cleanliness of its look now.


This bathroom is probably going to be re-done soon.  I can't take the baby blue anymore and our plans for it are much less involved than the bathroom downstairs.  Our inspiration for the upstairs bathroom:

final-bathroom-after-2

Here is the To-Do List:
  1. Paint the tone-on-tone horizontal stripes with tan and white paint colors (tying in with all of the tan in our foyers and hallways).
  2. Purchase new shower curtain rings (this is on the top of the list!)
  3. Buy/DIY some new art for the walls (I found some awesome flower art at Michael's but didn't buy it.   I will probably go back!)
  4. Add some decor stuff to the sink, toilet, and the little shelf above the vanity.
  5. Raise the shower curtain to give some height to the room (so the horizontal stripes don't weigh it down and make it feel wide and short)
We even brought some paint chips home to try out.  I tried to find a tone of beige that was a lighter version of the beige/tan in the hallways and foyer:


In other news, Josh and I are traveling to Cumberland today after work and staying the weekend with my family.  Josh's family is also going to be there for the WVU game.  I don't actually have a ticket, but my plan is to hit up all of my favorite shopping spots and my favorite sushi place in Morgantown.  I lived there for 5 years and I really miss it a lot.  So I will give up a football game any day to be able to do the things I loved there.  Have a great weekend :-)

Wednesday, October 5, 2011

Tuesday, October 4, 2011

Tasty Tuesdays: Beef Stir Fry


***Tasty Tuesdays is for sharing a meal/dessert/snack recipe that you made this week.  It doesn't have to be gourmet!  It just has to taste good! If you want to link up, let me know and I will link you to my Tuesday posts.  Use this^ button to link back to my page!  

This is one of my go-to dinners.  Except one problem: I couldn't find my recipe!  I haven't made this since before we moved so I am guessing that it got lost in the move.  Well, I still made it because I had the stuff and I generally remembered the recipe.  Plus, I have always appreciated cooks who make up recipes and don't use exact measurements.  I think cooking is much more like an art form that way.

So, I gathered the ingredients that I had:


I typically go with the regular generic frozen "stir fry medley" veggies, but that includes pepper and onion, which I already had (as you can see).  So I got this one instead:


And I am really glad I did because the broccoli, snap peas, and carrots were very tasty, fresh, and crunchy!  Josh and I are not huge fans of water chestnuts, so we were glad when there were only a few of them.  I also typically get some real thin slices of some kind of beef and then cut them into strips, but a few weeks ago, Josh and I had ribeyes for dinner and we didn't finish them.  So we cut them up and froze them for later.  I whipped those out and had free beef!


So, first I made the marinade.  I chopped half of a vidalia onion, added 1/2c soy sauce, 1/2c water, 3 tbsp sugar, and about 2 cloves of garlic, pressed.  Then I added the beef and let that sit while I started on everything else.

Ewww.  It looks gross.

I started the rice.  When it comes to having rice in my house, I don't go cheap.  I full-heartedly believe that couponing and buying generic brands are important for a family on a budget.  However, everyone has a few things that they simply need to have a brand name for.  For instance, Josh needs brand name cereal and Jif peanut butter.  I have even tried to sneak in generic cereal by purchasing the ones that most visibly resemble the name brand, pouring the cereal into a Tupperware thing (which we do anyway), and getting rid of the box.  He takes one bite and he knows.  He will not eat it. And my things are: Mahatma Basmati rice, Saran Wrap brand plastic wrap, and Sabra hummus.

Anyway, I have tried making rice in my steamer and it never really seemed to work.  I like it dry and sticky, like Chinese food rice, for this dish, so I went with the old stove top method.  I made a cup of rice.  It's quite a lot for two people, but I usually overdo this dish because we both like to take leftovers to school for lunch.

Rice simmering.

I have found that it works best when you simmer it on the lowest possible setting.  I do not touch it at all until the time is up (I definitely use a timer for this one--just whatever the recommendation is on the package), and then I fluff it with a fork just before serving it.

While the rice is simmering, I added the frozen veggies to a pan with some olive oil to warm those up a bit while I cut the other vegetables.


I sliced red pepper, orange pepper, the other half of my onion, and some leftover asparagus from another dish.  I actually just realized that I have been sharing Tasty Tuesdays for 3 weeks now and in every recipe I use peppers.  Yeah, I like 'em.  I also used to just use half of an onion in this dish, but I specifically remember Josh requesting more onion last time, so I did that.


Then I added the fresh veggies to the warmed frozen ones, added a bit more olive oil, some salt and pepper, and sauteed them up!

oooohhh... how pretty and colorful!

While they were all getting cooked, I put the marinade and beef into a pot and brought it to a boil, then combined it all together.  We love that the vegetables are still crunchy...


And the best part: leftovers!!!


***On a side note, if I had not had the leftover cooked steak and would have started with raw beef, I would have done it a little different.  I would have marinaded the raw beef, then added the beef to a pan and browned it, then added the sauce back in and boiled it for quite some time before adding the vegetables.  I usually boil it for a while it the sauce/marinade is soaking raw meat so that I kill all of the bacteria.  I am pretty paranoid about this, so I have been known to have it at a rolling boil for at least 8-10 minutes.  Obviously, that's not necessary.  But it doesn't hurt anything, right?

Monday, October 3, 2011

Mirror, Mirror, On the Wall

When I was at Marshall's a few weeks ago buying an ironing board cover to update our ironing board, I picked up this beauty for only 12 bucks.


I LOVE circle mirrors and this one was just awesome.  But there was one problem.  I didn't like the antique-iness of it, see?


So I thought, Easy fix.  I'll just paint it.

I would have liked to paint it a crazy color like pink or yellow or something, but couldn't really find a reason.  So I figured I would paint it a charcoal gray (safe) and if I ever wanted to change it I could.  So I gathered my stuff.  I thought it would be easy.  I would just take the mirror out, spray paint the outside part, and then stick the mirror back in.  It looks like you can do that because of the cardboard on the back and the little clasps that seem to be holding it in.


But, of course, it wasn't that easy.  The cardboard was glued to the glass, which was also glued to the edges of the mirror.  There was no chance of getting it out.  Plan B was to cover the mirror, and paint around it.  But how?  I have plenty of card stock, but couldn't bear the idea of wasting it on this, so I used old already-colored pieces of card stock that I had printed as coloring pages and then colored (or partially colored).  I just taped them on with painters tape and cut them in a circle, taped around the edges so that I would not get any paint on the mirror itself, and then spray painted it!


I know what you're thinking.  And the answer is yes.  I actually print card stock into coloring pages (sometimes even Sponge Bob) and color them with Sharpie markers.  So sue me.

Anyway, after letting the paint dry and revealing the final product, I was satisfied.  My intention was to put the mirror in the office upstairs, but on my way up, I saw an opportunity.  And it was meant to be:


At the top of the stairs!  Please ignore the weird light at the top.  How do you like it?  I don't know if that is going to be its permanent home, but it looks good for now.


I just had to take a picture of me taking a picture.  And this seemed like the most appropriate face.

Saturday, October 1, 2011

Paint Problems

We suck.  We have never painted before and have never had to choose a color so we are having a hard time.  But I think we finally found one.  Before we announce the winner and actually go buy the paint and paint the dang room, I will show you a history of how we chose the color:


Then, buy some more.


Then, when you have it narrowed down...


Go purchase a sample for $5.


Realize it's wayyy too bright.  Go buy some more samples...


Still a no-go.  Go buy one more.  Except this time the guy at the paint store gives it to you for free because you have been there so many times.


Finally find the right one.  Then realize that if you don't paint tomorrow (Sunday), you will have to do it during the week (which isn't easy).  Or do it this weekend.  Oh yeah, you will be out of town, duh.  Ok.  Next weekend.  Oh yeah.  Out of town then too.  Whoops.  My wall might look like this for a looonnnng time.